
Static Site Deployment - Hugo
This entire site is being generated by the Hugo static site generator, and the tutorial provides documentation on the process used to maintain this site as well as guidance for others who would wish to do the same.
Why a Static Site?
Using a static website generator offers more speed and security than a site generated dynamically with WordPress or another content management system. Also, using a tool such as this allows for easy switching between themes. While it is possible to use the output of such a tool directly on Amazon S3 or Github Pages, this tutorial’s focus will be on integrating this into a traditional VPS and web server.
Pre-Requisites
To complete this tutorial, the following items must be available:
- Hugo installed on any supported OS (Linux, BSD, macOS, or Windows)
- Git installed on the same system
- A hosting solution for Git which is reachable by both the editing workstation and the web server. This could be Github, Gitlab, Gitea, or other tools. Gitea is a simple choice which is documented in another article on this site.
- A user account on the web server which can use SSH to connect outward to the Internet.
Create Base Site
The first step is to create a skeleton framework of a website. This includes the configuration file, directories for templates, raw content, themes, and rendered output, among others. This tutorial will focus on the “content” folder which contains the raw posts, articles, and other materials for the website and on the “public” directory which contains the final, rendered output of the site to be loaded onto a web server or other storage location.
Fortunately, Hugo has a special “subcommand” to create the framework. The below example will create a directory named “website”. This can be named anything that is a valid directory for the OS in use. For simplicity’s sake, this directory should also be a valid name for a Linux system.
hugo new site website
NOTE: Multiple websites can be managed in their own directories rather easily, but this is outside the scope of this tutorial.
Create Git Repository - Local
Once the Hugo site framework has been created, a Git repository needs to be created to manage changes to the site as well as more easily transport those changes to other systems.
Change into the “website” directory and run:
git init
This creates a simple Git repository on the local system, ready for use with other systems, described below.
Create Git Repository - Git Host
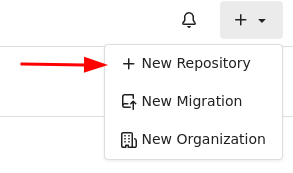
On the remote Git host create a new repository using the built-in feature of the solution. In Gitea, the “New Repository” function should be used to create a space to store the site.
When reviewing the new repository, make a note of the SSH clone URL so that it may be used later.

Creating the Deploy Key
After creation of the repository, a Deploy Key must be added so that the web server can pull the contents of the site to the web server. While logged into the web server, run the following command to check for an existing key:
ls -l ~/.ssh/id*.pub
If any file names are returned, a keypair already exists, and the next paragraph and command should be skipped.
Should the previous command return no results, no key exists on this account. To create a new key, use the below command and accept all defaults, including no passphrase for the key:
ssh-keygen
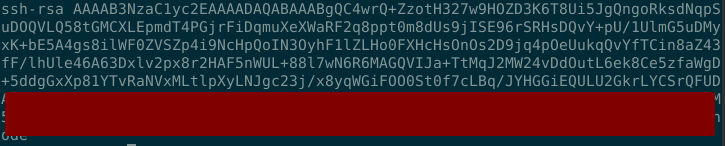
The SSH keygen command will generate a pair of keys, one public and one private. The keys will be stored in ~/.ssh/id_rsa and ~/.ssh/id_rsa.pub, respectively.
Copy the contents of id_rsa.pub to a clipboard and visit the “Deploy Keys” page in the Gitea’s repo settings. Here, you can add deploy key for the repository.
Other Git hosting solutions, like Github and Gitlab, have a different location for deployment keys, but the purpose is the same, to provide read-only access to a repository.
Create Git Repository - Web Server
With the deploy key in place, the Git repository should be cloned to the web server. Create a directory in the home directory of the user on the web server who owns the deployment key installed in the last step. Then, clone the repository from the Git host to the web server.
git clone https://<git host>/<repo>
Prepare Web Location
Next, the web server needs configured to host the new site. If hosting at the top level of a site like “example.com”, a new configuration file can be created for Apache or nginx. This tutorial assumes Apache as the server of choice. Once the site configuration file is created, it can be told to start with the Apache server using:
a2ensite <website>.conf
Below is an example of an Apache configuration with the fewest configuration options:
<VirtualHost example.com:80>
    ServerName    example.com
    DocumentRoot    /var/www/website
</VirtualHost>
Next, the location from “DocumentRoot” needs created with the proper permissions. The simplest mechanism is to create the directory and assign it permissions which allow the Apache service to read the files and the regular user of the web server to write to the DocumentRoot location.
After enabling the site, restart Apache with:
sudo systemctl reload
Also, permissions need granted to allow for the user hosting the repository on the web server. A variety of options can be chosen here, as long as the user hosting the repository on the web server has the ability to write files to the DocumentRoot. The simplest is to change the ownership of the DocumentRoot to accommodate the user on the web server hosting the Git repo. For example,
chgrp <user> /var/www/website
chown g+w /var/www/website
The first above command will change the group owning that directory to one belonging to the user hosting the Git repo. The second command will provide write permission to all users in the primary group for .
Configure Periodic Pull
The “cron” utility is one great way to ensure the script is run regularly. Each user has a cron table, also known as a crontab, which defines commands to be run on a schedule and what those schedules are.
Below is a sample crontab entry for this pull:
0 * * * * cd /home/<user>; git pull origin main
This will run this task every hour, a the top of the hour. Of course, the frequency of the pull from the Git host can be adjusted. Given a low-volume site, an hour is more than enough. Oft-updated sites might be better to have an update frequency of 10 minutes or less. If nothing changes in the source Git repository on the shared Git hosting solution, no output will be created by cron.
Configure Git Hook
One final item to be created before being done…
To automate the update of the website, some mechanism must know when there is a change in the Git repository on the web server. Git has a method of responding to events to the repository in the form of hooks. Hooks come in a wide variety of flavors, including client-side and server-side hooks. They can react when a commit is made or when Git is getting ready to push changes to another repository but not yet sent anything elsewhere.
This tutorial will take advantage of the post-merge hook. This hook will trigger after a merge in the repository. So, when any article, post, or other content is changed and checked into the repository, the hook script will run.
Creating the hook script is to create a new file in .git/hooks with the name of the hook being used. Here, the name should be “post-merge”.
Below is an example hook script which can be modified and used with this tutorial:
#!/bin/bash
cd /home/<user>/website
rm -rf /home/<user>/website/public/*
hugo
rsync -az --delete /home/<user>/website/public/* /var/www/website/
This hook script must then be made to be executable:
chmod u+x ~/website/.git/post-merge
Now, when a change is made to the repository from a local workstation and pushed to the Git host, the periodic pull will bring them to the web server, and the web server will distribute those.
Final Steps and Conclusion
With all of these items accounted for, a site can be created and modified so that when the changes are as desired, an automated deployment can occur. Running the hook script manually could also force a change to shop up as needed.
The Hugo Quickstart guide does a great job of providing details about adding themes, creating actual content, and making the experience easy and worthwhile.